CU-Baby Chicks & Chickens: How Do I Butcher A Chicken For Eating?
A Step by Step Tutorial
This post contains photos of a chicken being butchered. If you do not wish to see detailed photos of this process, please go visit another course in the university.
This tutorial is intended to show how I process a chicken. The reason I do this is not for fun or entertainment. I take this very seriously and I do it despite the fact that I care for my animals and dislike killing them. I choose to process my own chickens so my family has access to clean meat that was raised and slaughtered as humanely as possible. My family is opposed to the inhumane treatment of animals in factory farms and large scale processing facilities. That’s why I do this.
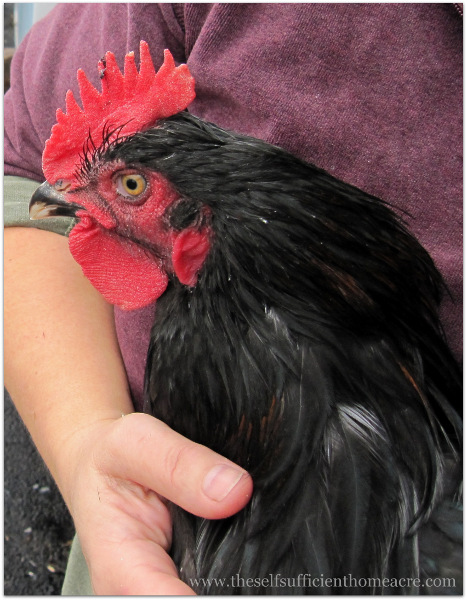
A Black Broiler meat bird…not as big or fast growing as a Cornish x hybrid.
Okay, you have been warned about the contents of this post and if you are still reading, you must really be interested in learning about this process. Here we go…
It is best if you can withhold food overnight from the birds that will be butchered. This helps to clean out their digestive tract for easier evisceration. I will often butcher as a last minute decision without doing this. I have practiced enough that I can process a chicken without getting feces on the carcass. When you first start out, I would not advise this. Be sure to provide fresh water for your death row chickens.
Have everything set up ahead of time. Make sure your knife is very sharp. I have a table for final processing, a bucket of water with a bit of bleach and some rags for cleaning my knife and the table, a basket lined with a garbage bag for the offal, and a burner with my scalding pot (and a candy thermometer) all ready to go.
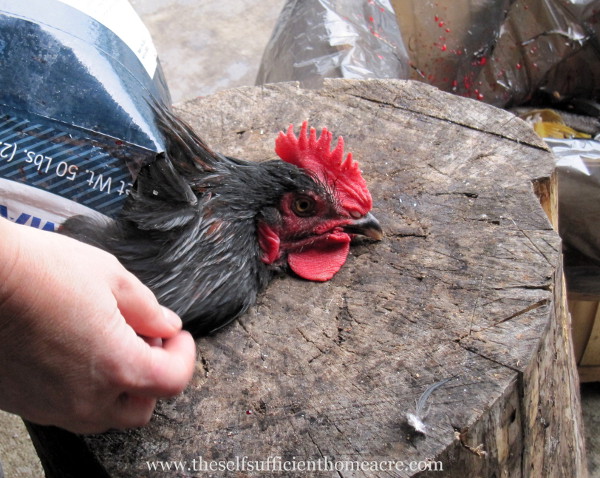
I put the chicken into a feed bag with a hole cut in one corner for the head to poke through. This allows me to hold the bird still so that I don’t miss the neck with my axe, and also prevents the carcass from flopping around. That tends to bruise the meat
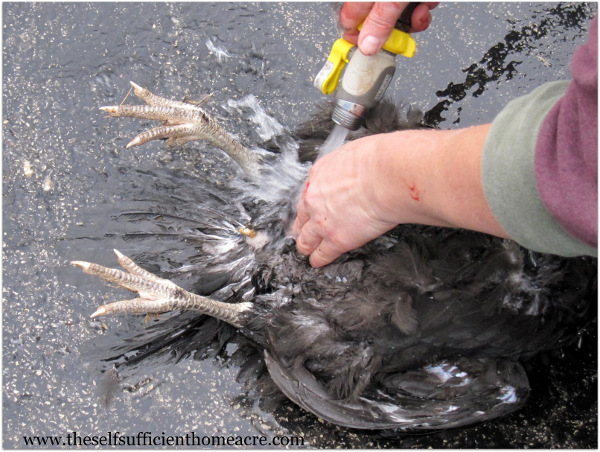
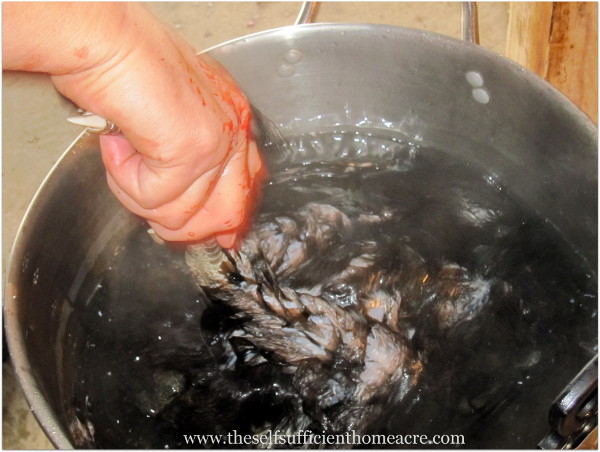
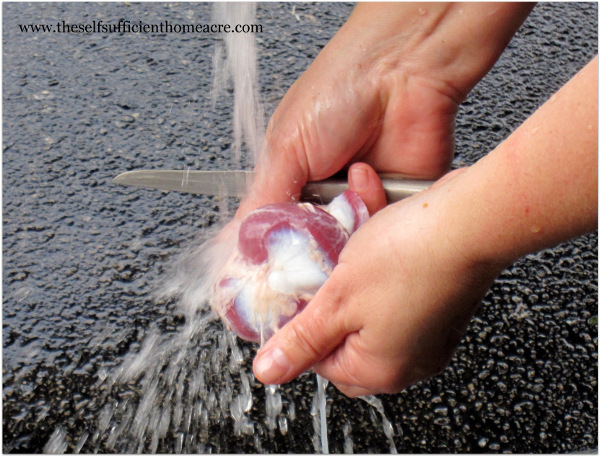
I sever the neck with a sharp axe quickly, after thanking the bird for giving its life and apologizing for what I am going to do. It makes me feel a little better but I’m sure it makes no difference to the chicken. I wait for the reflexes to stop and then I wash the bird off to remove feces and dirt.
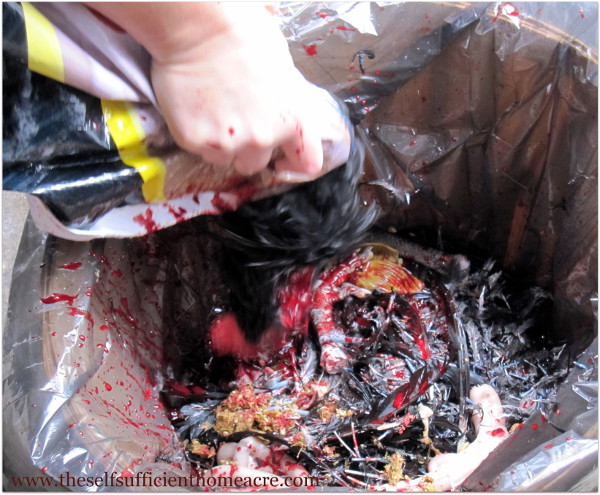
Once it is cleaned off, dunk the carcass into a pot of scalding water (145 to 150 F) for 1 minute. This makes it much easier to pluck the feathers. Be sure your water is up to the right temp before you start chopping heads off. You may want to add a drop of dish soap to make the scalding water penetrate the feathers better. I usually forget this until I’m standing there with a bird in the pot.
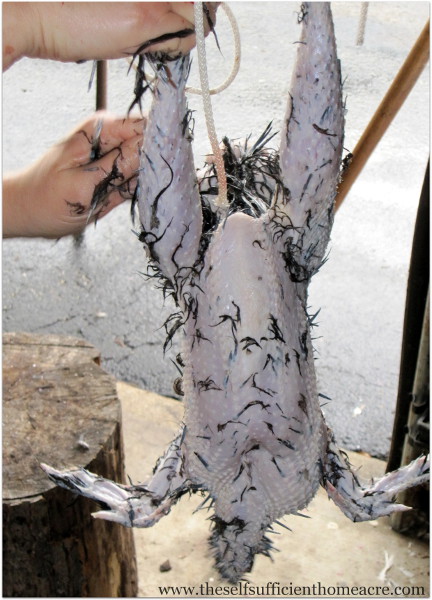
The scalded bird is hung over a receptacle for the feathers and entrails. Plucking is quick and easy if the bird is scalded properly. If the water is too cool, the feathers don’t come off easily. If the water is too hot, the skin will cook and pull away from the meat as you pluck.
I don’t worry too much about getting all of the feathers off at this point. There will be time for cleaning them off later. It is important to work quickly so that the carcass is disemboweled and cooled quickly.
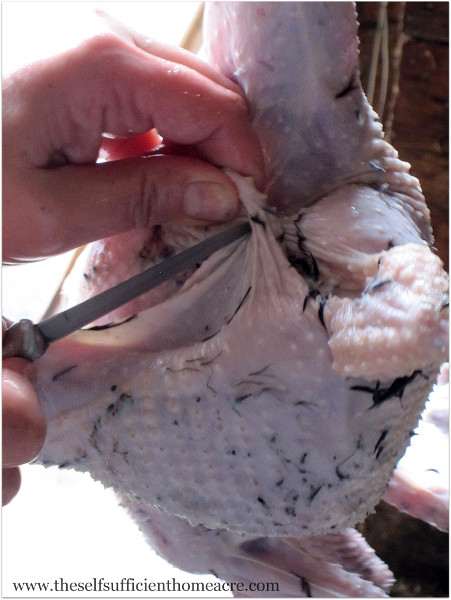
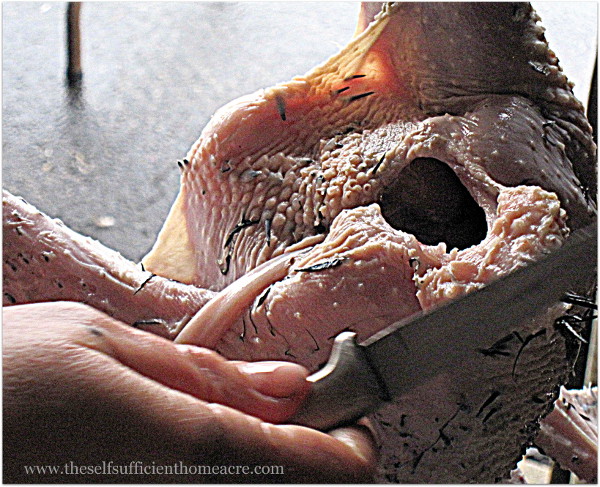
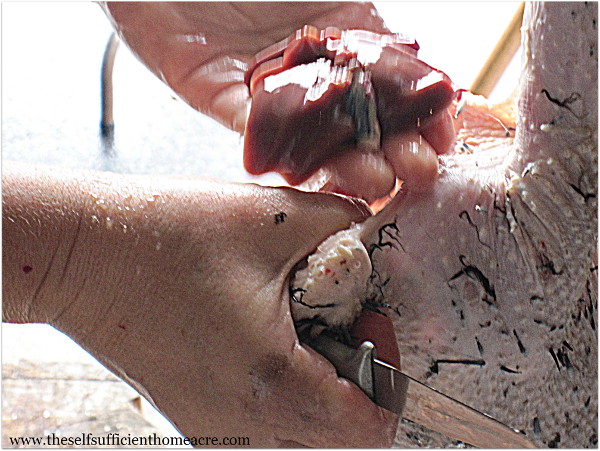
After plucking, give the carcass another rinse and then hang it back up for evisceration. Take care when cutting into the abdomen. You don’t want to puncture the intestines and spill feces into the body cavity. I find it is easier if I pinch the skin with one hand and use a sharp knife to cut through this pinched spot with the other hand.
Once the initial cut is made you will see where the innards are and you can avoid cutting into them. Locate the rectum leading up to the vent. Use one hand to pinch of the vent from the inside and use the other hand to cut around the vent. The back of the vent will be attached to the inside of the body cavity with fatty tissue. Be careful cutting around this area.
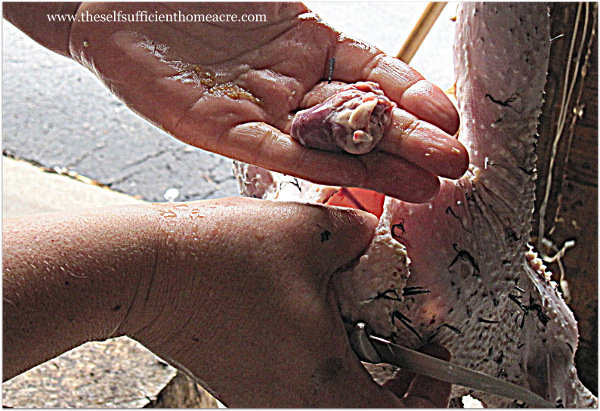
After vent is cut free, begin pulling the intestines gently from the body cavity. Once the vent is pulled away from the body, you can increase the size of the incision and insert your hand into the body cavity. Use your hand to carefully lift the bulk of the intestines out. During this process you want to pull gently so that the intestines don’t rupture and spill feces into the body cavity.
The other end of the intestines will be attached to the gizzard. Use your hand to scoop the gizzard out. You may be able to pull the heart, liver and crop out all in one piece. I find this is rarely the case, because the crop is attached to the skin of the neck/chest area. As long as you can pull the gizzard out without rupturing the intestines, you’re doing pretty well. Cut the intestines away from the gizzard if you wish to save it.
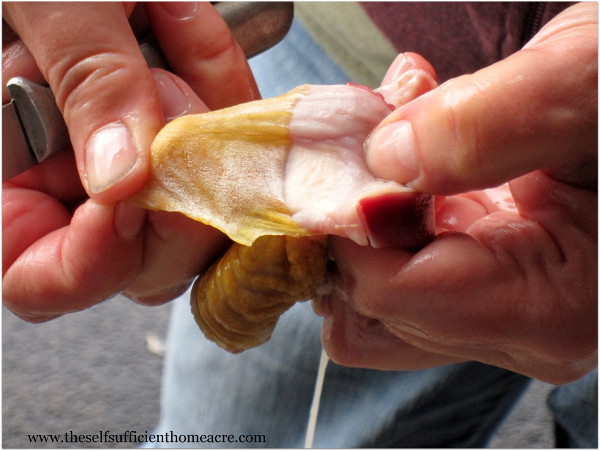
If you are saving the gizzard, you will need to slice it open and clean it. Slice from hole to hole and open it up. Inside will be grit and possibly some food. Dump this out and rinse the gizzard
Once you have the gizzard washed off, you will be able to see the tough, yellow lining. This needs to be peeled away. It is a bit tricky to get started, but then it will come off easily. Place the gizzard in a container.
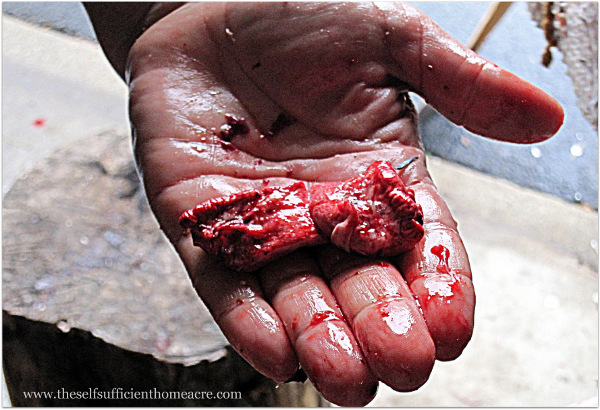
Stick your hand back into the body cavity. The squishy thing is the liver. Pull it out and look for the green bile sac. This needs to be cut away without spilling the green bile on the liver. I try to cut a little bit of the liver away with the bile sac to prevent contaminating the liver with bitter bile.
Wash the liver and put it with the gizzard. Next you will pull out the heart. Rinse it off and place it in the container with the other giblets.
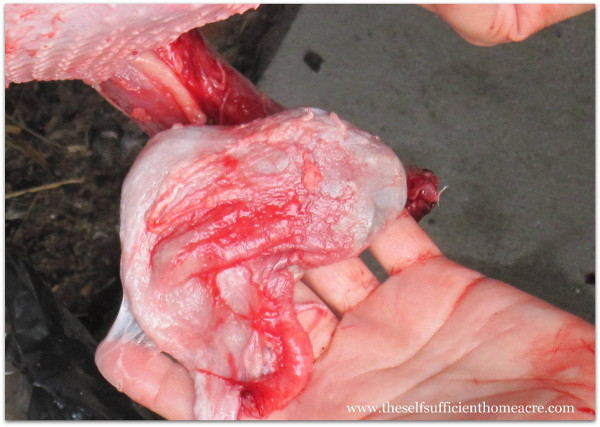
Wash the liver and put it with the gizzard. Next you will pull out the heart. Rinse it off and place it in the container with the other giblets. The lungs are a bit harder to locate. You will find them nestled into the rib cage in the chest cavity. Use your fingers to sweep them from the rib cage. I feed these back to the chickens or cook them for the dog. You will also need to pull the crop away from the skin under the neck of the chicken. You can feed this back to your chickens if it is filled with food
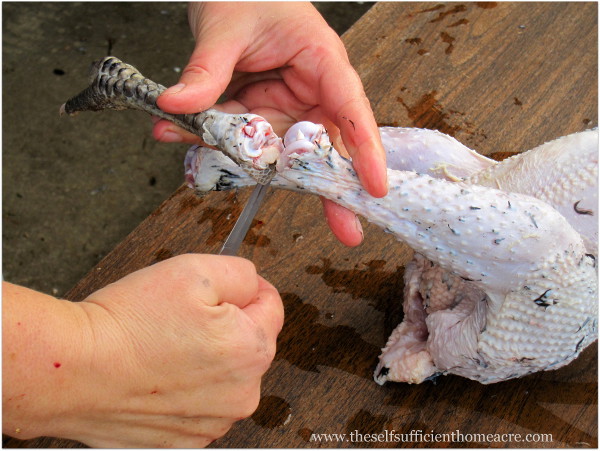
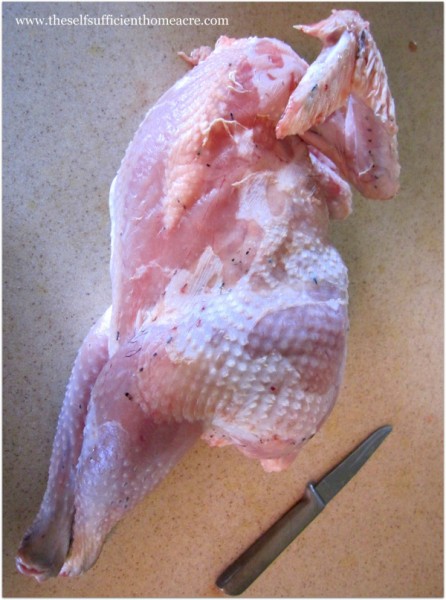
After all of the innards have been removed, rinse the carcass thoroughly, inside and out. Place it on your table to remove the feet. Locate the joint where the lower leg and drumstick meet. Cut through the skin and ligaments holding the joint together. You do not want to cut through bone or cartilage; you just want to cut the stringy ligaments. Bend the joint as you work to make it easier. If you wish, you can save the feet for making stock.
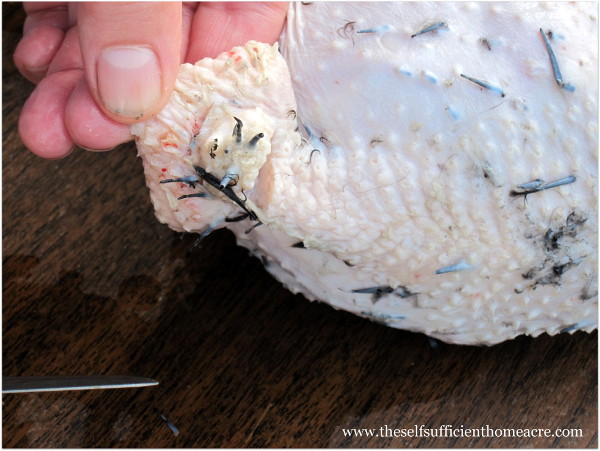
You also need to remove the oil gland on the top of the tail. It’s the bump that looks kind of like a big pimple. Cut around and under to remove it without getting the oil onto the carcass.
I’ve read that the oil gland will give the cooked bird a gamey flavor if it isn’t removed. I can neither confirm nor deny this, since I have always removed it. If you wish, you can burn away any pin feathers with a rolled up piece of newspaper that is lit on fire. I never do this…but then we don’t eat the skin, saving it for the dog. So I don’t care that much if there are some fine feathers left.
Now that you have finished dressing your chicken, give it another thorough rinse, pick any remaining feathers, and put it in the refrigerator for 24 hours before cooking. If the meat is not allowed to relax, it will be tough. If you plan to freeze the chicken, you can leave it in the refrigerator overnight or you can freeze it right away. Just be sure to pull the frozen bird out and let it thaw completely before cooking it. I have had good luck with this method.
A few notes before you start:
Make sure you have everything you need on hand before you start processing your birds.
If you can withhold feed overnight before butchering, do so. This will make the evisceration easier, especially when you are learning.
Work quickly and carefully. You want to chill your birds quickly to prevent the growth of nasty bacteria. But don’t sacrifice your own safety…be especially careful when you are using an axe or knife. The last thing you want is to end up in the emergency room with an injury.
It’s best if you have a helper on hand to share the responsibilities. If you are working alone, keep your cell phone in your pocket in case you get a nasty cut. Safety first!
This tutorial is intended for educational purposes. If you engage in these activities, you do so at your own risk. This is how I process my chickens. You may find that other ways that suit you better.